Using the NUnit Test Generator is super easy:
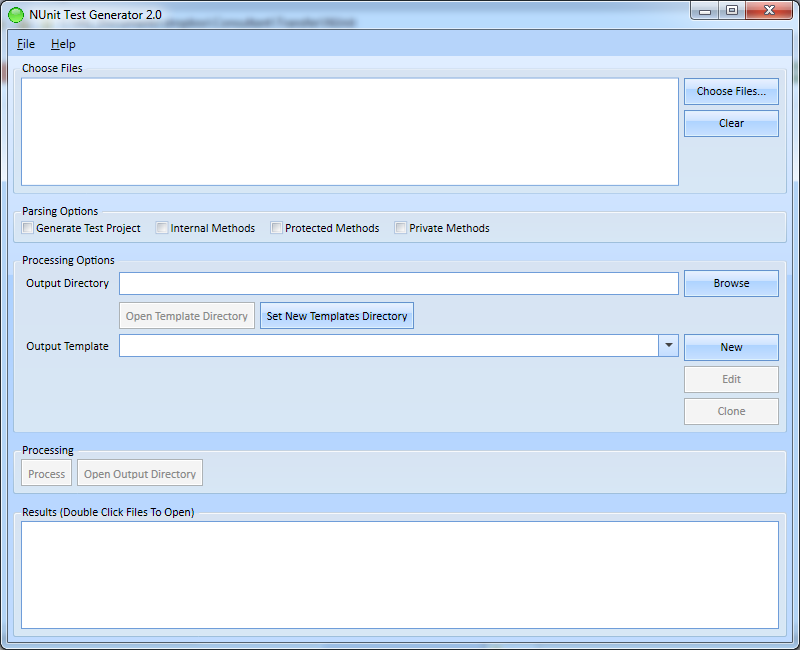
1. Choose the C# or VB.NET files that you want to create tests for. You can select single files or you can select a project file. Selecting a project file will create test stub files for every class in the project.
2. Choose the Parsing Options. By default, only test stubs will be created for public methods and properties. You can select Internal Methods, Protected Methods, or Private Methods to generate stubs for methods with the respective scope. You can also check Generate Test Project to generate a Visual Studio Project for your tests.
3. Choose the output directory for the generation.
4. Choose the template. For an explanation of each template, see the Template Description topic.
5. Click the Process button and the tests will be created.
At a fundamental level, NUnit Test Generator parses your class, then replaces the tags in a template with specific information from your class. Templates are provided for creating unit tests, interfaces, NHiberate Mappings, and WCF contracts. You can edit the existing templates or add new templates. To change variable prefixes/suffixes and file name prefixes/suffixes, see the Options on File Menu.
Most tests that are created for business object properties will work without any modification. However, all method tests that are created contain the Ignore attribute which gives you a marker to ensure the test performs as expected.
Methods that are overloaded in C# will have tests created for each overloaded method with a number after the test name. The documentation that the NUnit test generator creates, contains the complete method signature to be able to tell which method needs tested.